How to Keep Solar Lights Working in Winter?

Time:2026-09-18 Author:Mason
0%

Winter can make a reliable solar light seem unexpectedly weak. Shorter daylight, heavy clouds, snow, and freezing temperatures reduce the energy reaching the battery. A lamp that shines until dawn in July may fade before midnight in January. So, can solar lights stay out in winter? In most cases, yes, but their performance depends on placement, battery quality, weather protection, and regular care.

A practical winter check begins with the solar panel. Clear snow and ice with a soft, dry cloth, then angle the panel toward the strongest available daylight. Avoid placing it beneath thick branches, roof edges, or outdoor decorations. Even a thin layer of dirt can reduce charging efficiency. Check the light’s IP rating and inspect its housing for cracks, loose seals, or trapped moisture. Water damage often appears slowly.

Battery care matters most. Cold weather can reduce battery capacity, especially when older rechargeable cells are already weakened. Replace batteries with the manufacturer’s recommended type, rather than choosing a random substitute. Keep the switch accessible, and test the light after several cloudy days. It may not perform perfectly.

This guide explains practical ways to protect solar lights through winter, improve charging, and identify failures before replacement becomes necessary. It also addresses common mistakes, such as covering panels with plastic or storing lights without checking battery condition. Some advice depends on local weather and product design, so careful observation remains essential. Winter maintenance is simple, but ignoring small problems can shorten a light’s useful life.
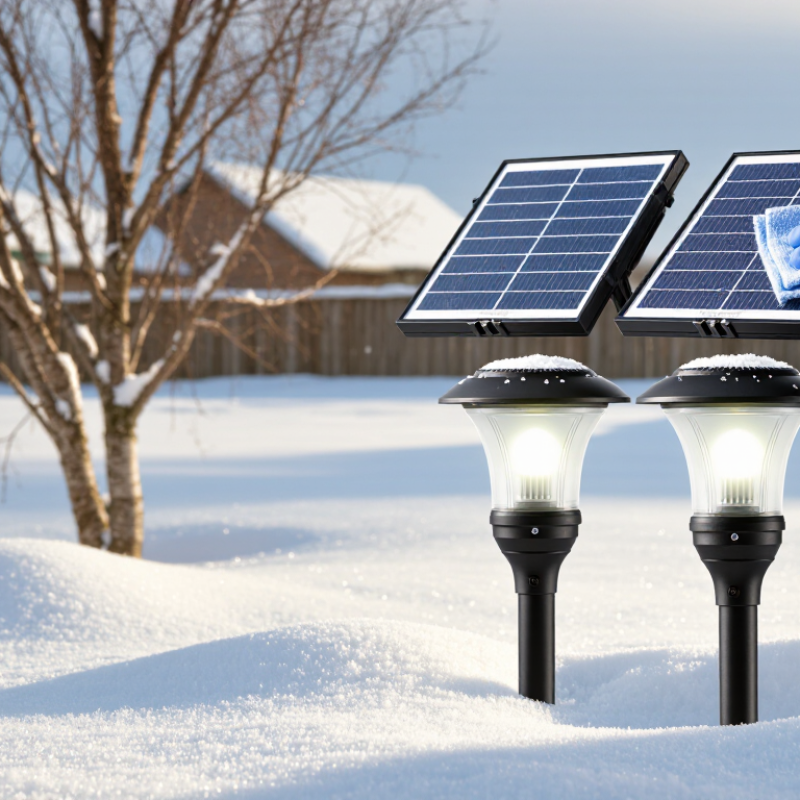
How to Keep Solar Lights Working in Winter?

Understand How Winter Weather Affects Solar Lights

How to Keep Solar Lights Working in Winter?

Understand How Winter Weather Affects Solar Lights

Winter changes more than the temperature around your solar lights. Shorter days provide fewer charging hours, while the sun stays lower in the sky. Thick clouds can reduce charging further. A light that works well in July may glow briefly in December.

Snow and frost can cover the panel like a white blanket. Even a thin icy layer blocks useful sunlight. Wipe the panel gently with a soft, dry cloth after snowfall. Avoid scraping it with metal, which may leave tiny scratches. Wet leaves can also collect around the panel and create shade.

Cold weather affects rechargeable batteries too. Their chemical reactions slow down, so they may store less energy overnight. In my winter checks, lights often performed better after moving them away from fences and roof shadows. Placement matters. A panel facing the open southern sky usually receives more winter sunlight in the Northern Hemisphere.

Keep the panel clean.

Moisture creates another problem. Repeated freezing and thawing can enter cracked housings or loose seals. Inspect the casing, cable, and battery compartment before severe weather arrives. Replace damaged parts with weather-suitable components. I once blamed weak winter sunlight, but a loose cover was allowing condensation inside. That mistake was a useful reminder: seasonal performance problems are not always caused by the season.

Prepare Solar Panels for Reduced Winter Sunlight

How to Keep Solar Lights Working in Winter?

Prepare Solar Panels for Reduced Winter Sunlight

Winter reduces charging time, even when the sky looks bright. Solar panels need clear exposure throughout the shorter daylight period. In my experience, small obstructions become more serious during December and January. A nearby branch can cast shade when the sun stays low.

Clean each panel with a soft, damp cloth before winter begins. Remove dust, dried leaves, frost, and bird residue carefully. Avoid abrasive tools, which may scratch the panel surface. Check the panel angle as well. A slight adjustment toward the winter sun can improve daily exposure, depending on your location.

Keep the panel away from deep snow. Brush snow off gently with a soft hand brush. Do not pour hot water over frozen surfaces. Sudden temperature changes may damage some materials. I once ignored a thin layer of frost and noticed weaker lighting that evening. It seemed minor, but repeated loss added up.

Inspect the cable and housing for cracks or loose connections. Moisture can enter through damaged seals during freezing weather. Rechargeable batteries also lose efficiency in low temperatures, so place the light where the battery compartment stays protected. Not every setup needs a perfect angle. However, testing the light after cloudy days can reveal problems early. Check it at dusk.

How to Keep Solar Lights Working in Winter? - Prepare Solar Panels for Reduced Winter Sunlight

Winter Factor Typical Effect on Solar Lights Recommended Preparation Practical Target or Range
Shorter daylight hours The panel has fewer hours available to collect energy, especially in northern locations. Place the panel where it receives unobstructed midday sunlight and avoid shade from walls, trees, and fences. Prioritize the brightest 4–6 hours of the day whenever possible.
Lower sun angle Sunlight reaches the panel at a different angle, which can reduce the energy captured by a fixed panel. Tilt the panel toward the winter sun and keep the surface facing the open sky. Use a steeper tilt than the summer setting where the design allows adjustment.
Cloudy weather Clouds reduce solar radiation, so the battery may not reach a full charge during several overcast days. Reduce unnecessary operating time and use the lowest brightness setting that meets safety needs. Expect charging performance to vary substantially between clear and cloudy days.
Snow on the panel A layer of snow can block most incoming light and may stop charging until it is removed. Remove snow gently with a soft brush or cloth. Do not scrape the panel with metal tools or pour hot water over it. Keep the photovoltaic surface visibly clear after snowfall.
Frost and ice Frost or ice reduces light transmission and can create a temporary charging interruption. Allow light frost to melt naturally when possible, then wipe the surface with a soft, dry cloth. Inspect the panel after freezing rain or overnight frost.
Cold battery temperature Low temperatures can temporarily reduce battery capacity and may shorten nighttime runtime. Use a battery rated for the expected outdoor temperature and keep the battery compartment dry and sealed. Check the product’s operating-temperature and charging-temperature limits.
Moisture and condensation Water entering the housing can cause corrosion, flickering, or permanent electrical damage. Inspect seals, covers, and cable entry points. Install the light according to its outdoor protection rating. Keep the battery compartment closed and free from standing water.
Dirt and debris Dust, mud, leaves, and salt residue reduce the amount of light reaching the photovoltaic cells. Clean the panel with lukewarm water and a soft, non-abrasive cloth. Dry it afterward. Inspect at least monthly and after storms or heavy pollution.
Nighttime energy demand Longer winter nights increase the number of hours the battery must power the LEDs. Use motion or dusk-to-dawn controls wisely, and lower brightness when continuous lighting is unnecessary. Match the expected runtime to the battery capacity and seasonal sunlight available.
Panel positioning A panel that faces a shaded or obstructed area may collect too little energy for reliable winter operation. Reposition the panel before winter and check for new shadows caused by low-angle sunlight. Choose the location with the longest unobstructed exposure during winter midday.
Battery maintenance An aging rechargeable battery stores less energy and may fail to hold a full charge during winter. Replace the battery only with a compatible rechargeable type and follow the light manufacturer’s specifications. Consider replacement when runtime remains poor after cleaning, repositioning, and several clear days.

Note: Actual winter performance depends on latitude, weather, panel orientation, battery condition, light output, and the product’s operating specifications.

Protect Batteries from Cold Temperatures and Moisture

When temperatures fall, solar lights may look broken even when their circuits are fine. Cold slows battery chemistry, reducing the energy available after sunset. I once blamed a failing light, then found frost and damp leaves inside its battery compartment. Check the compartment on a dry afternoon. Remove the battery, wipe moisture with a clean cloth, and let the housing air-dry completely. Do not heat it with a flame or place a wet battery on a radiator. Tiny details matter.

Use rechargeable batteries specified for the light, and check their temperature range. Some batteries tolerate cold better than others, but all lose capacity in freezing weather. A fully charged battery can still provide shorter nighttime lighting. Keep the panel clear of snow, ice, and heavy dirt, because weak daytime charging worsens cold-weather problems. Inspect the rubber seal and cover for cracks. If water returns after drying, replace the damaged seal or move the light beneath a sheltered overhang. It may not be a battery fault.

For severe freezes or long periods without sunlight, switch the light off and store the battery indoors, somewhere dry and cool. Avoid storing it fully depleted. Recharge it according to the instructions before reinstalling it. I used to tighten the cover aggressively, believing pressure guaranteed protection. It sometimes distorted the seal instead. Gentle, even closure works better. Check the lights weekly during wet weather, especially after thawing.

Adjust Light Placement and Settings for Better Performance

Winter sunlight is weaker, so solar lights need careful placement and realistic settings. I have found that moving each light only a few inches can improve charging. Place panels where they receive direct midday sunlight, not beneath branches, roof edges, or fences. South-facing positions usually work well in the Northern Hemisphere. Keep panels angled toward the winter sun, which sits lower in the sky. Wipe away dust, frost, and snow with a soft, slightly damp cloth.

Tips: Test the lights at several times during the day. A location that looks bright at noon may become shaded by afternoon. Use the lowest practical brightness setting when longer runtime matters. Reduce motion-sensor sensitivity near busy paths. This prevents unnecessary activation and saves stored energy. Check that the panel is not tilted toward a nearby wall, where reflected light may be insufficient.

My first winter setup stayed dark before dawn because I prioritised appearance over sunlight. That was a useful mistake. I now separate decorative lights from essential pathway lighting. Decorative units can run for fewer hours, while pathway lights need a clearer charging position. If your lights offer timing controls, shorten their operating period during cloudy weeks. Cold temperatures can reduce battery performance, even when the panel charges properly. Inspect the battery compartment for moisture, and replace aging batteries with the specified type. Do not expect perfect brightness every night. Weather changes quickly.

Maintain and Test Solar Lights Throughout the Winter Season

Winter sunlight is weaker, and snow can block a solar panel within hours. Check each light weekly, especially after storms. Brush away snow with a soft cloth, then wipe off salt, dust, and muddy water. Keep panels angled toward the open sky, not beneath branches or roof edges. Small changes matter.

Test the lights at dusk every few days. Confirm that they switch on automatically and stay bright for several hours. A short runtime often indicates poor charging, an aging rechargeable battery, or unexpected shade. Cold temperatures can reduce battery performance, so compare results on similar nights. I once blamed the battery, but a nearby hedge was blocking afternoon sunlight. A simple observation fixed the problem.

Inspect the housing, seals, and contacts during each check. Look for condensation, cracked plastic, loose wires, or green corrosion around the battery terminals. Clean contacts only when the light is switched off, and follow the product’s battery instructions carefully. Do not mix old and new rechargeable batteries. If a removable light faces severe freezing or prolonged snow cover, store it in a dry indoor place after charging it. This is not always necessary, and moving lights too often can damage small connectors. Keep a brief test record with the date, weather, and operating time. That imperfect record can reveal a gradual problem before the light stops working.

FAQS

Why do solar lights become dimmer during winter?

Winter brings shorter days, lower sunlight, and more cloud cover. The panel receives fewer charging hours. A July light may glow briefly in December.

How should I remove snow or frost from a solar panel?

Brush snow away with a soft, dry cloth. Wipe thin ice gently after it loosens. Avoid metal scrapers, which can scratch the panel. Keep it clean.

Where should I place solar lights during winter?

Choose an open area facing the southern sky in the Northern Hemisphere. Avoid fences, roof edges, branches, and wet leaves. Small shadows can reduce afternoon charging.

Can cold weather damage rechargeable batteries?

Cold slows battery chemistry and reduces available energy. Even a fully charged battery may provide fewer lighting hours. Check its temperature range before winter use.

How can I protect the battery compartment from moisture?

Inspect the cover, casing, and rubber seal on a dry afternoon. Wipe away moisture with a clean cloth, then let the housing air-dry. Never heat a wet battery with a flame or radiator.

What should I do during severe freezing or long cloudy periods?

Switch the light off and store the battery indoors if possible. Keep it dry and cool, not fully depleted. Recharge it according to the instructions before reinstalling it.

How often should I test solar lights in winter?

Check them weekly, especially after snow or rain. Test each light at dusk and record its operating time. My notes were incomplete, but they still revealed gradual changes.

What could cause short lighting time besides cold weather?

Possible causes include dirty panels, heavy shade, aging batteries, corrosion, or loose seals. I once blamed the battery, but a nearby hedge blocked sunlight. Look closely before replacing parts.

Should I tighten the battery cover firmly?

Close it evenly without forcing it. Excessive pressure can distort the seal and allow condensation inside. Gentle closure works better. Sometimes less pressure protects more.

Conclusion

Winter can challenge solar lights through shorter daylight hours, cloudy skies, snow, ice, and freezing temperatures. To keep them working, clean the panels regularly and remove snow or debris so they can capture as much sunlight as possible. Place the lights where they receive direct daytime sun, avoiding shade from buildings, trees, or heavy winter cover. If you are wondering, “can solar lights stay out in winter,” the answer is generally yes when they are designed for outdoor use and properly protected from moisture and extreme cold.

Cold weather can reduce battery performance, so check the battery compartment for water, corrosion, or loose connections and replace worn batteries when needed. Adjust brightness or operating times to conserve stored energy during long nights. Throughout the season, test the lights regularly, wipe the panels gently, and reposition them as the sun’s angle changes. These simple maintenance steps can improve reliability and extend their useful life during winter.

Mason

Mason

Mason is a seasoned marketing professional with a deep expertise in the company's offerings and a passion for driving brand awareness. With a strong background in digital marketing strategies, he has an innate ability to connect with diverse audiences and effectively communicate product benefits.......